
Filter Flow
Transform your photos and videos with an intuitive node-based filter system. Chain effects together, blend inputs, and create unique visual experiences all on your devices.
How It Works
Input Nodes
Capture camera feed with optional adjustments like flipping and brightness control.
Color: Blue
Filter Nodes
Apply visual effects like blur, sepia, pixelate, and more with customizable parameters.
Color: Purple
Merge Nodes
Combine multiple inputs with blend modes like overlay, multiply, and screen.
Color: Green
Output Nodes
Deliver the final processed image or video to be captured or saved.
Color: Orange
Getting Started
1. Starting a New Graph
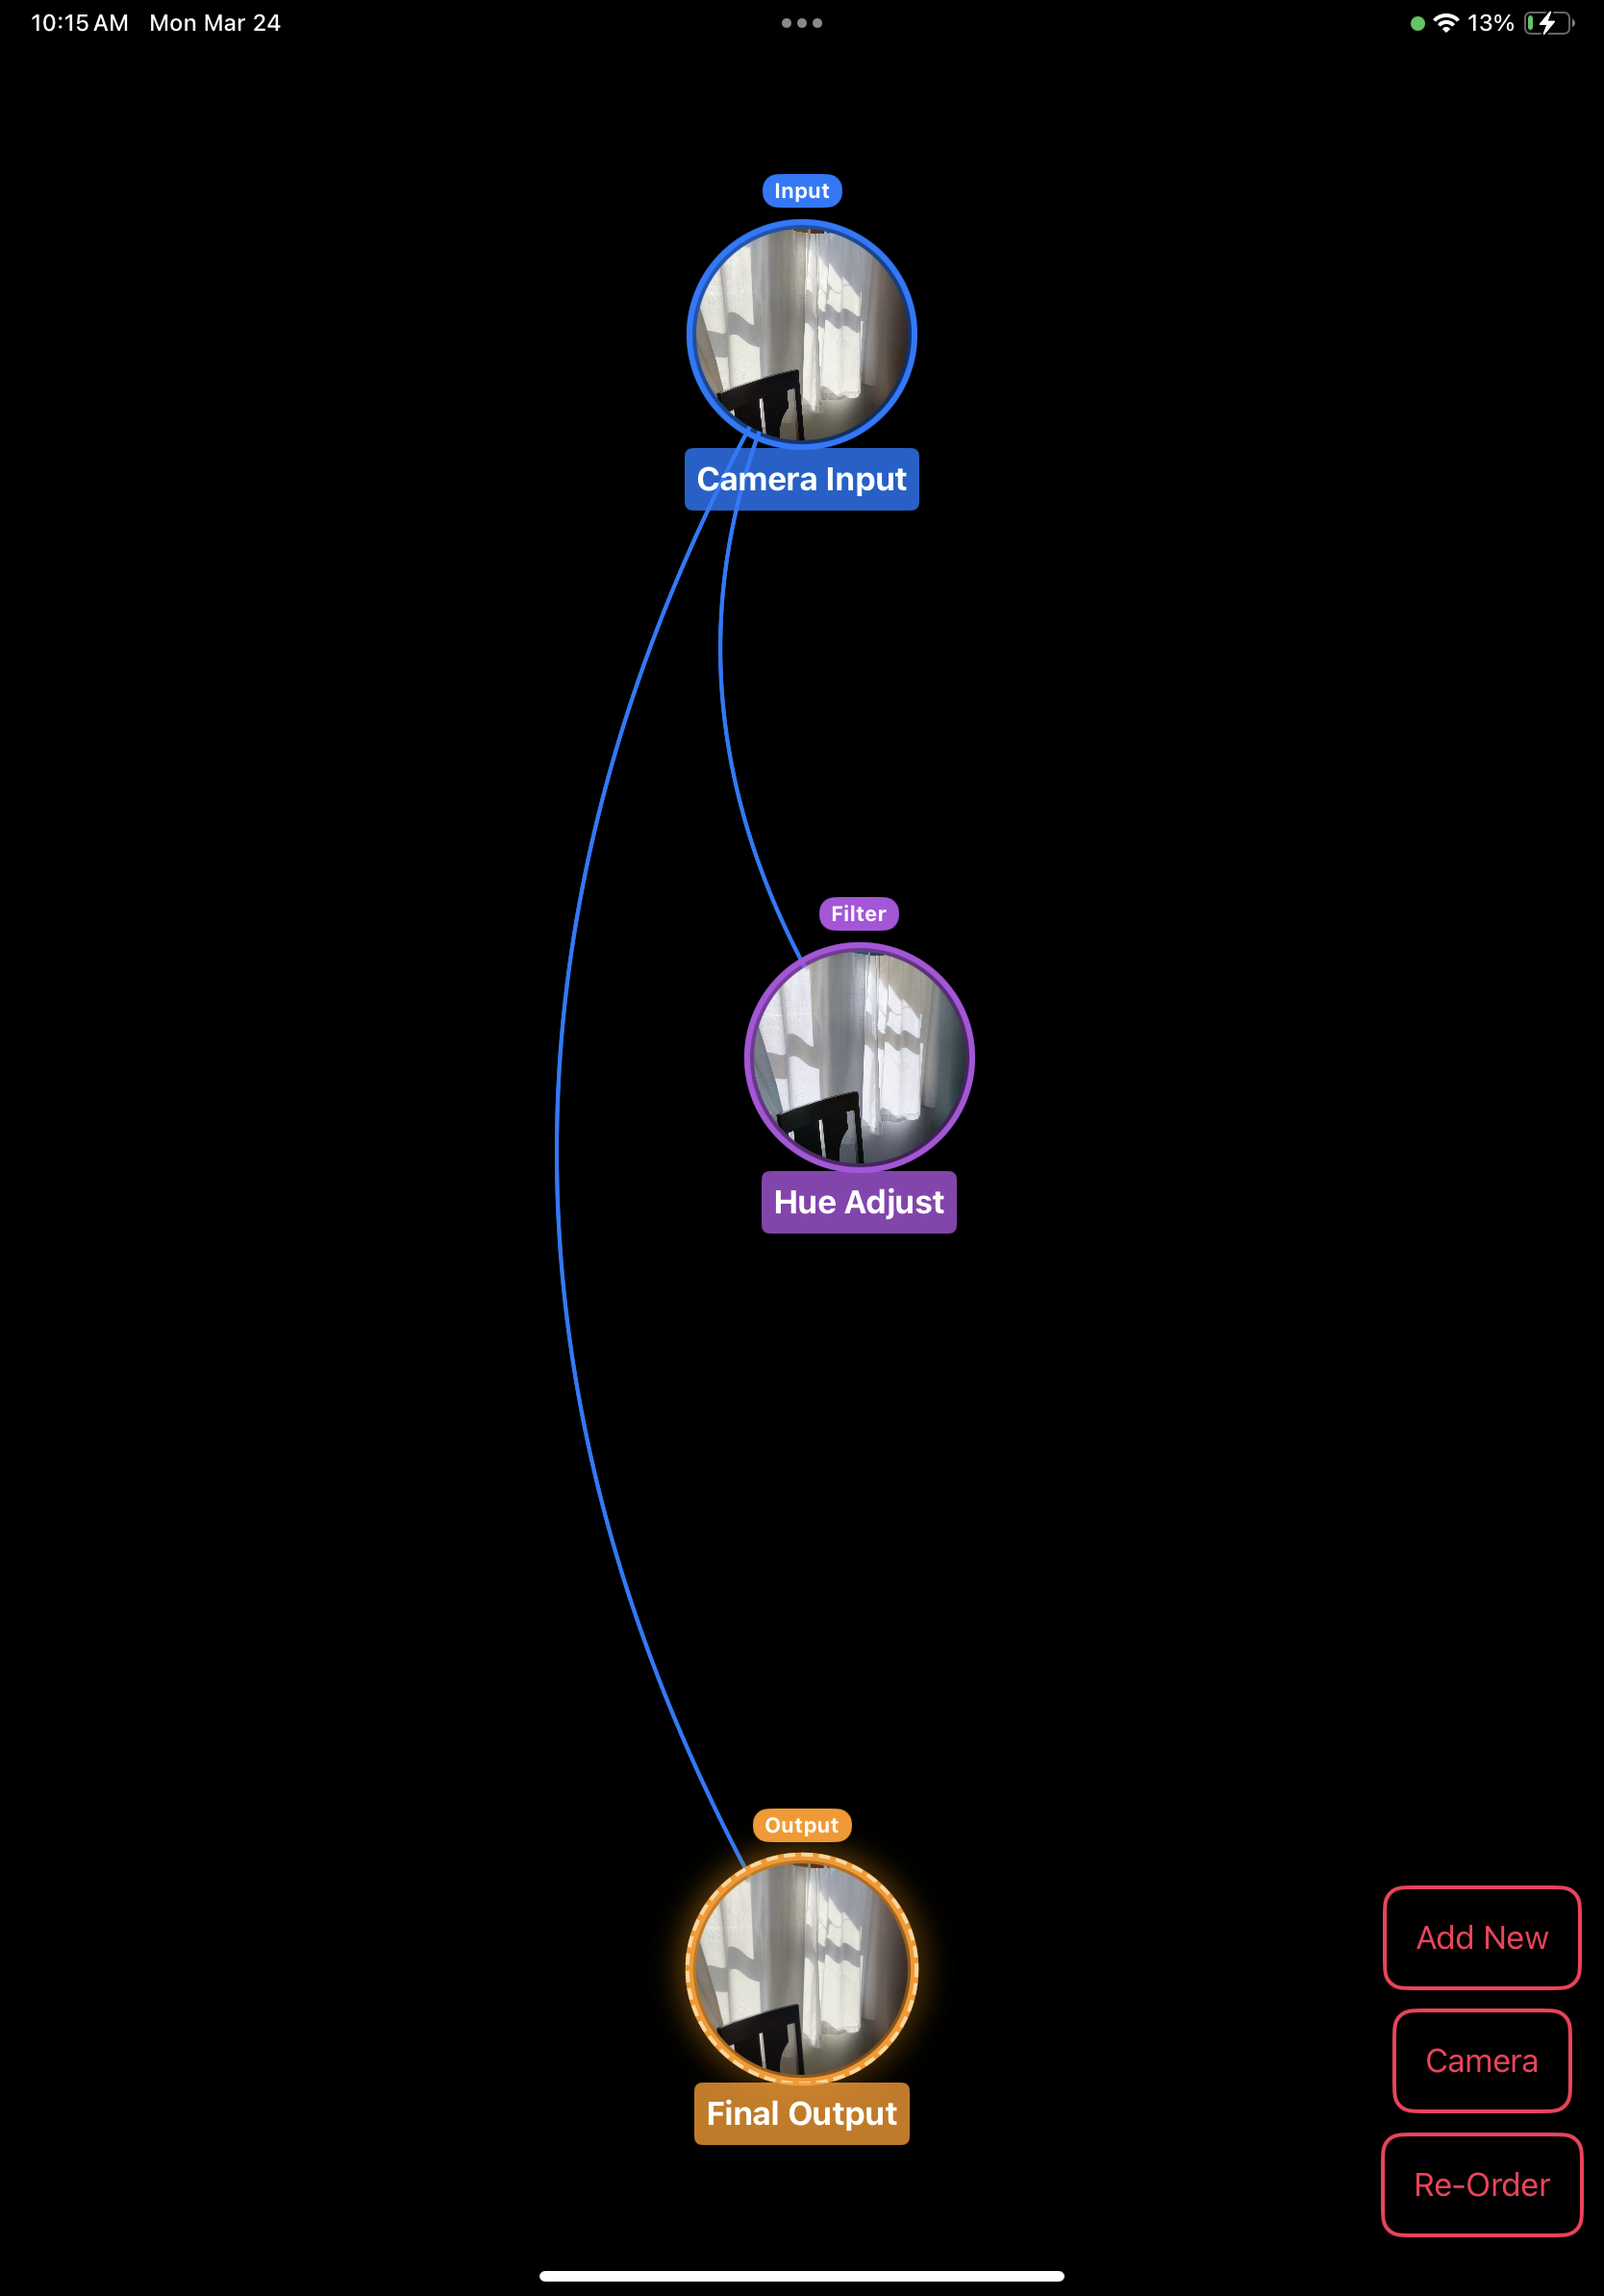
When you first open Filter Flow, you'll see the default setup with three basic nodes:
- A Camera Input node (blue) at the top
- A Filter node (purple) in the middle
- A Final Output node (orange) at the bottom
The blue lines connecting the nodes show how image data flows from input through filters to output.
2. Adding New Nodes
To add a new filter or effect:
- Tap the Add New button in the bottom-right corner
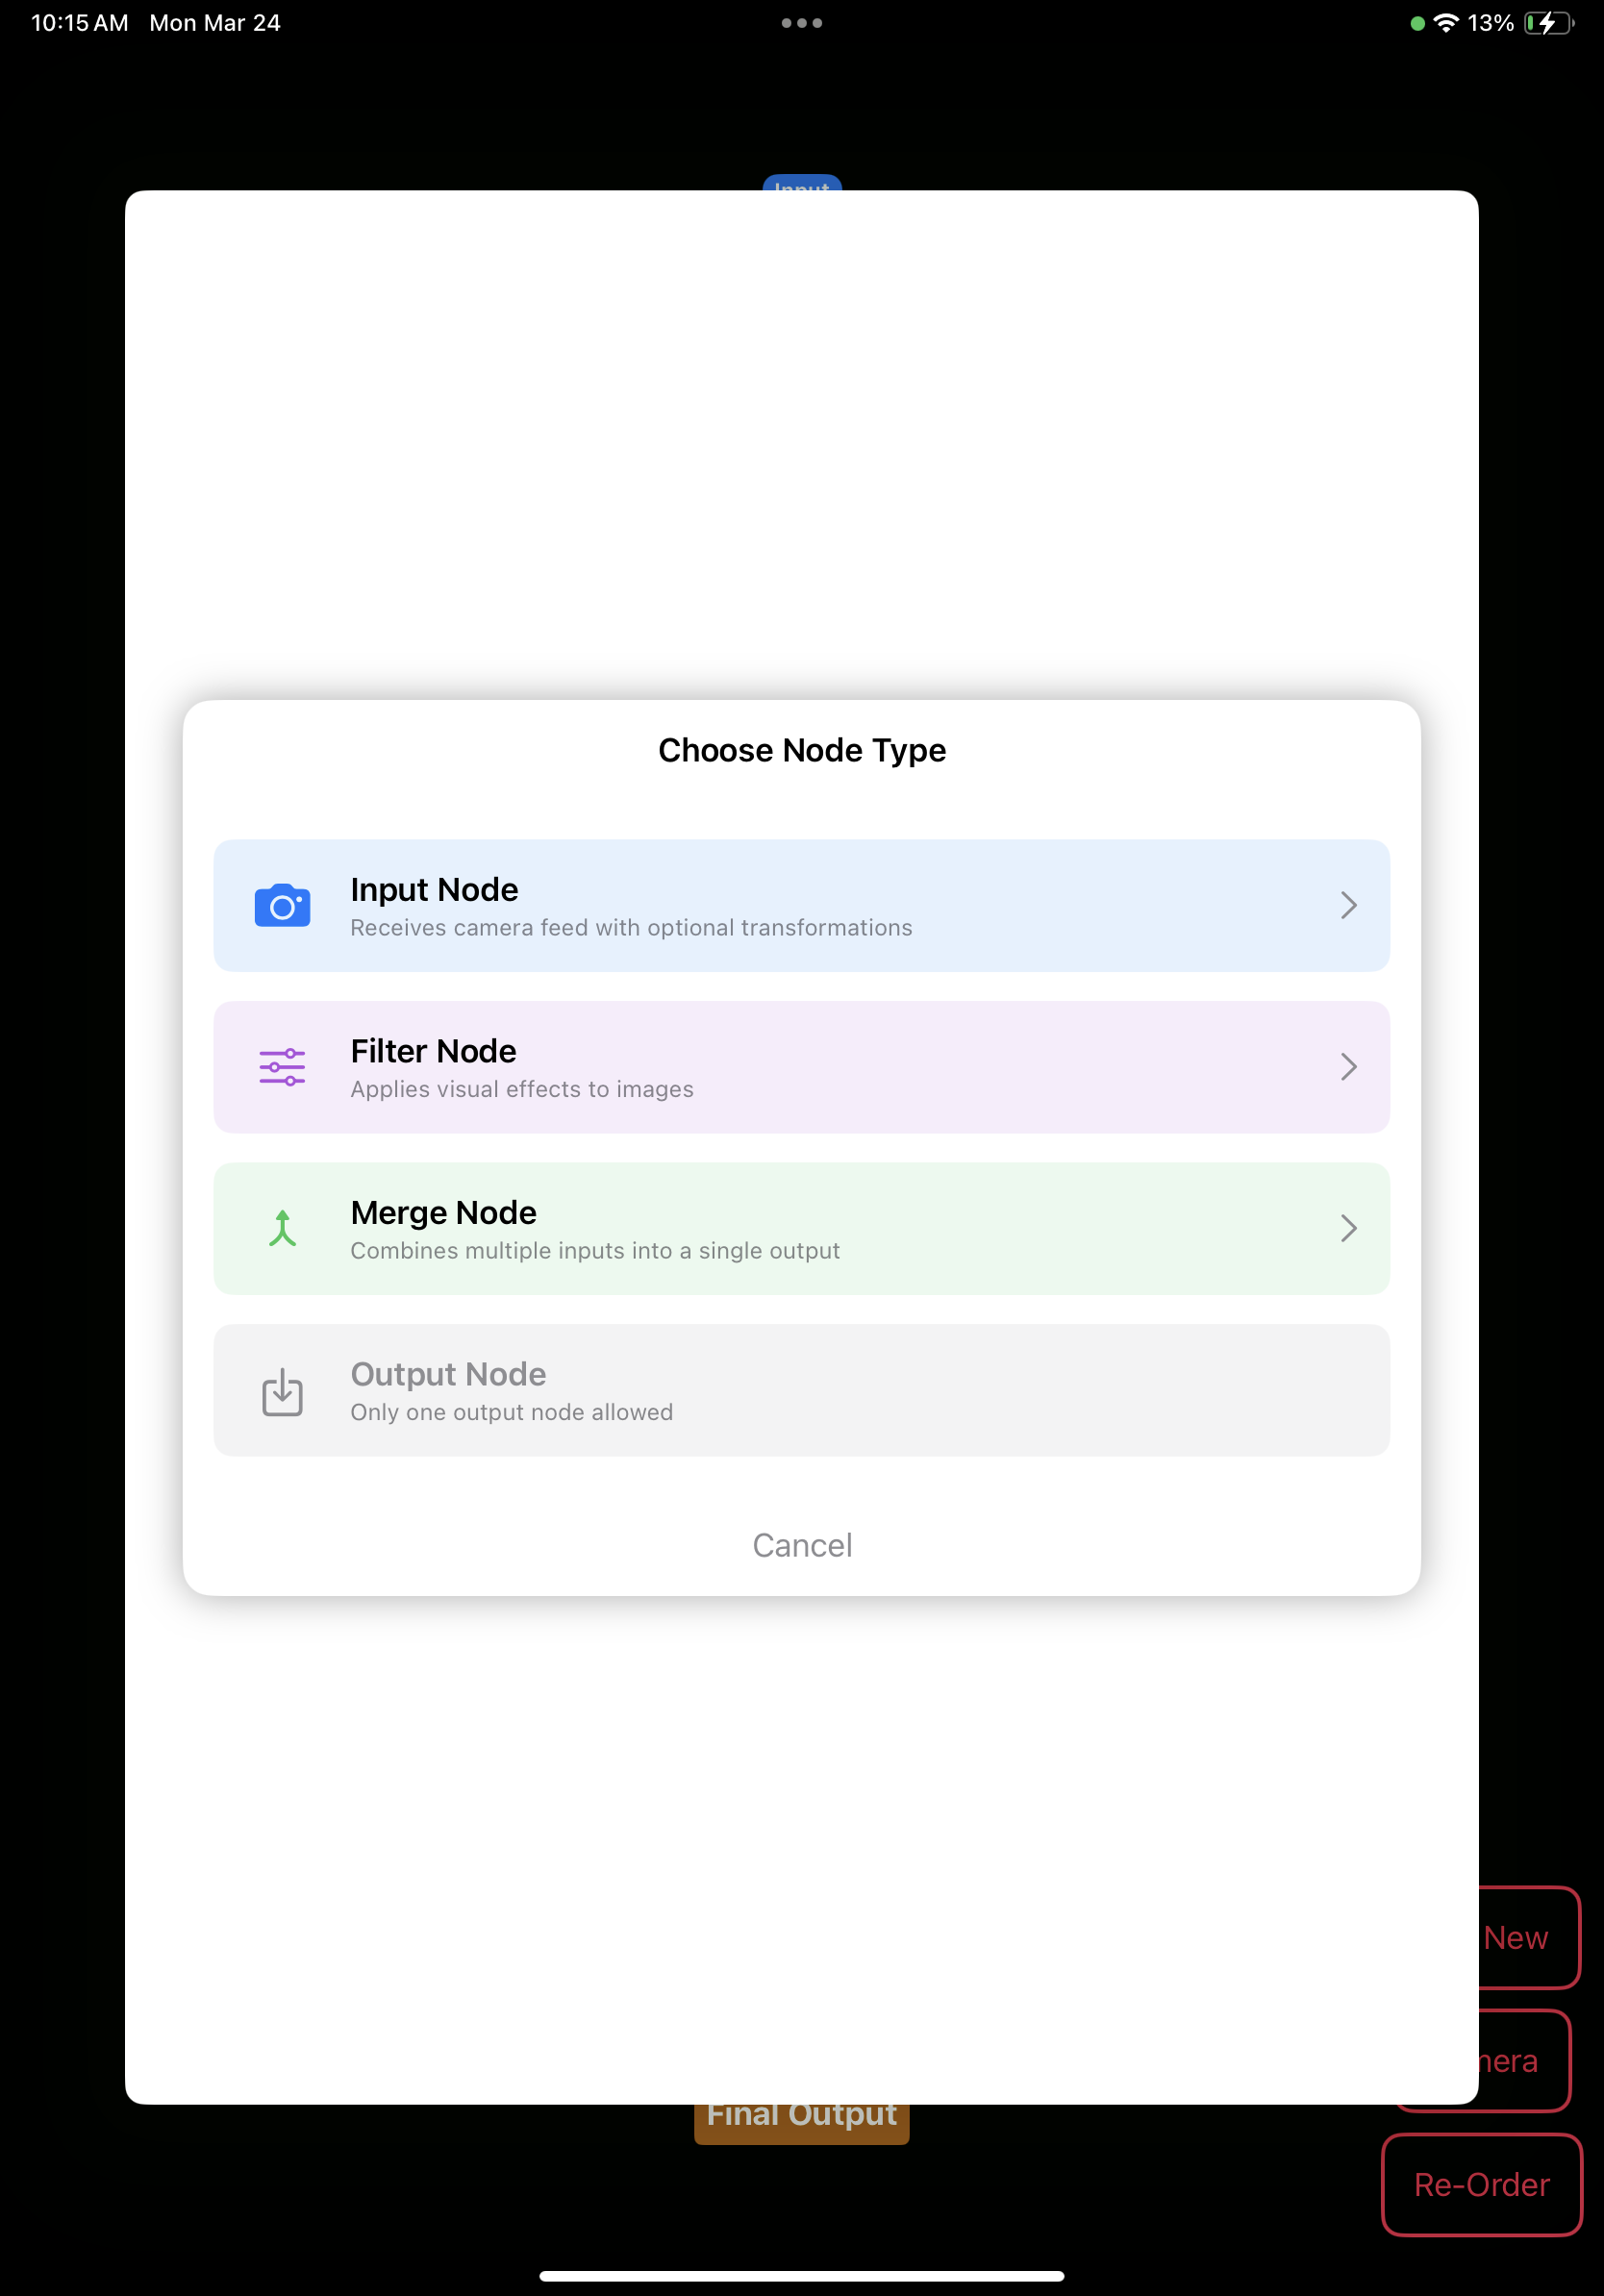
- Choose a node type from the popup menu
- Select the specific filter or effect you want to add
Each node type serves a different purpose in the processing chain:
- Input Node: Source of image data (camera)
- Filter Node: Applies visual effects
- Merge Node: Combines multiple inputs
- Output Node: Final result (only one allowed)
3. Editing Filter Parameters
Customize how your filters work by adjusting their parameters:
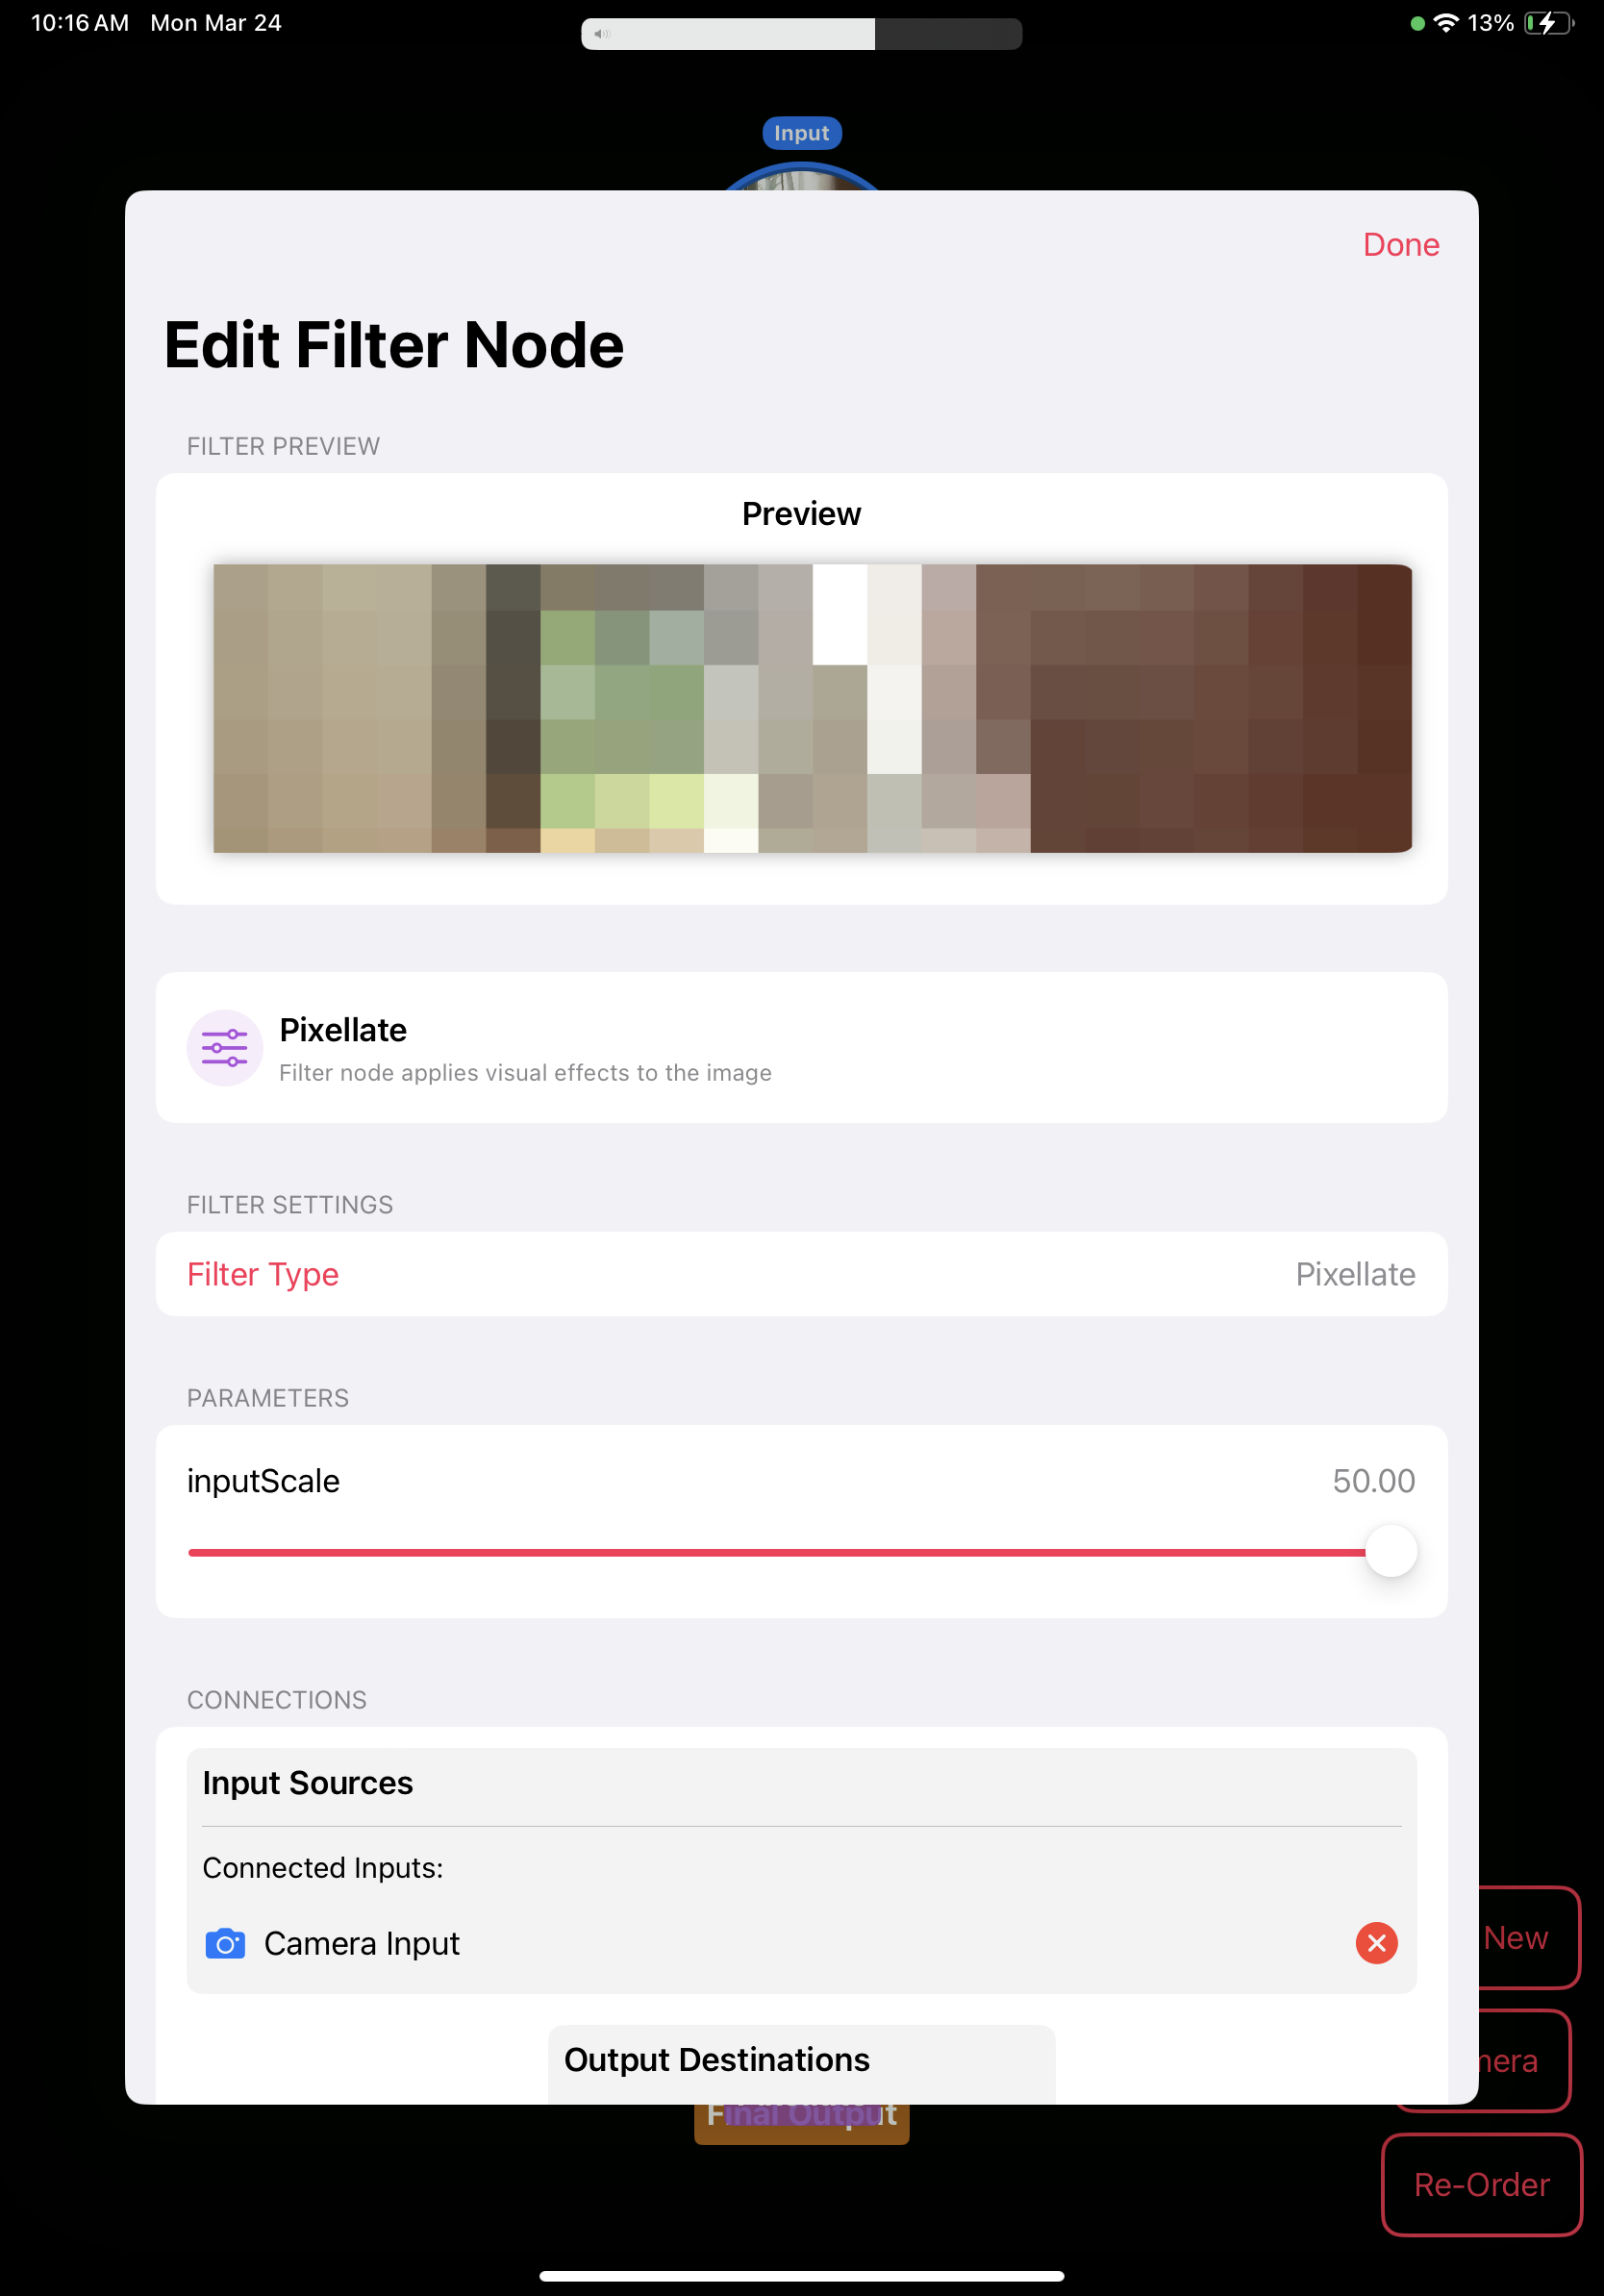
- Tap on any node to open its settings
- Adjust available parameters using the sliders
- See real-time preview at the top of the settings
- Tap Done when you're satisfied
Different filters have different parameters. For example, a pixelate filter lets you control the scale of the pixelation effect.
4. Creating Complex Filter Chains
Build sophisticated effects by connecting multiple nodes:
- Add several filter nodes to create a processing chain
- Drag nodes to reposition them on the canvas
- Connect nodes by tapping one and then another
- Use Re-Order to automatically organize your nodes
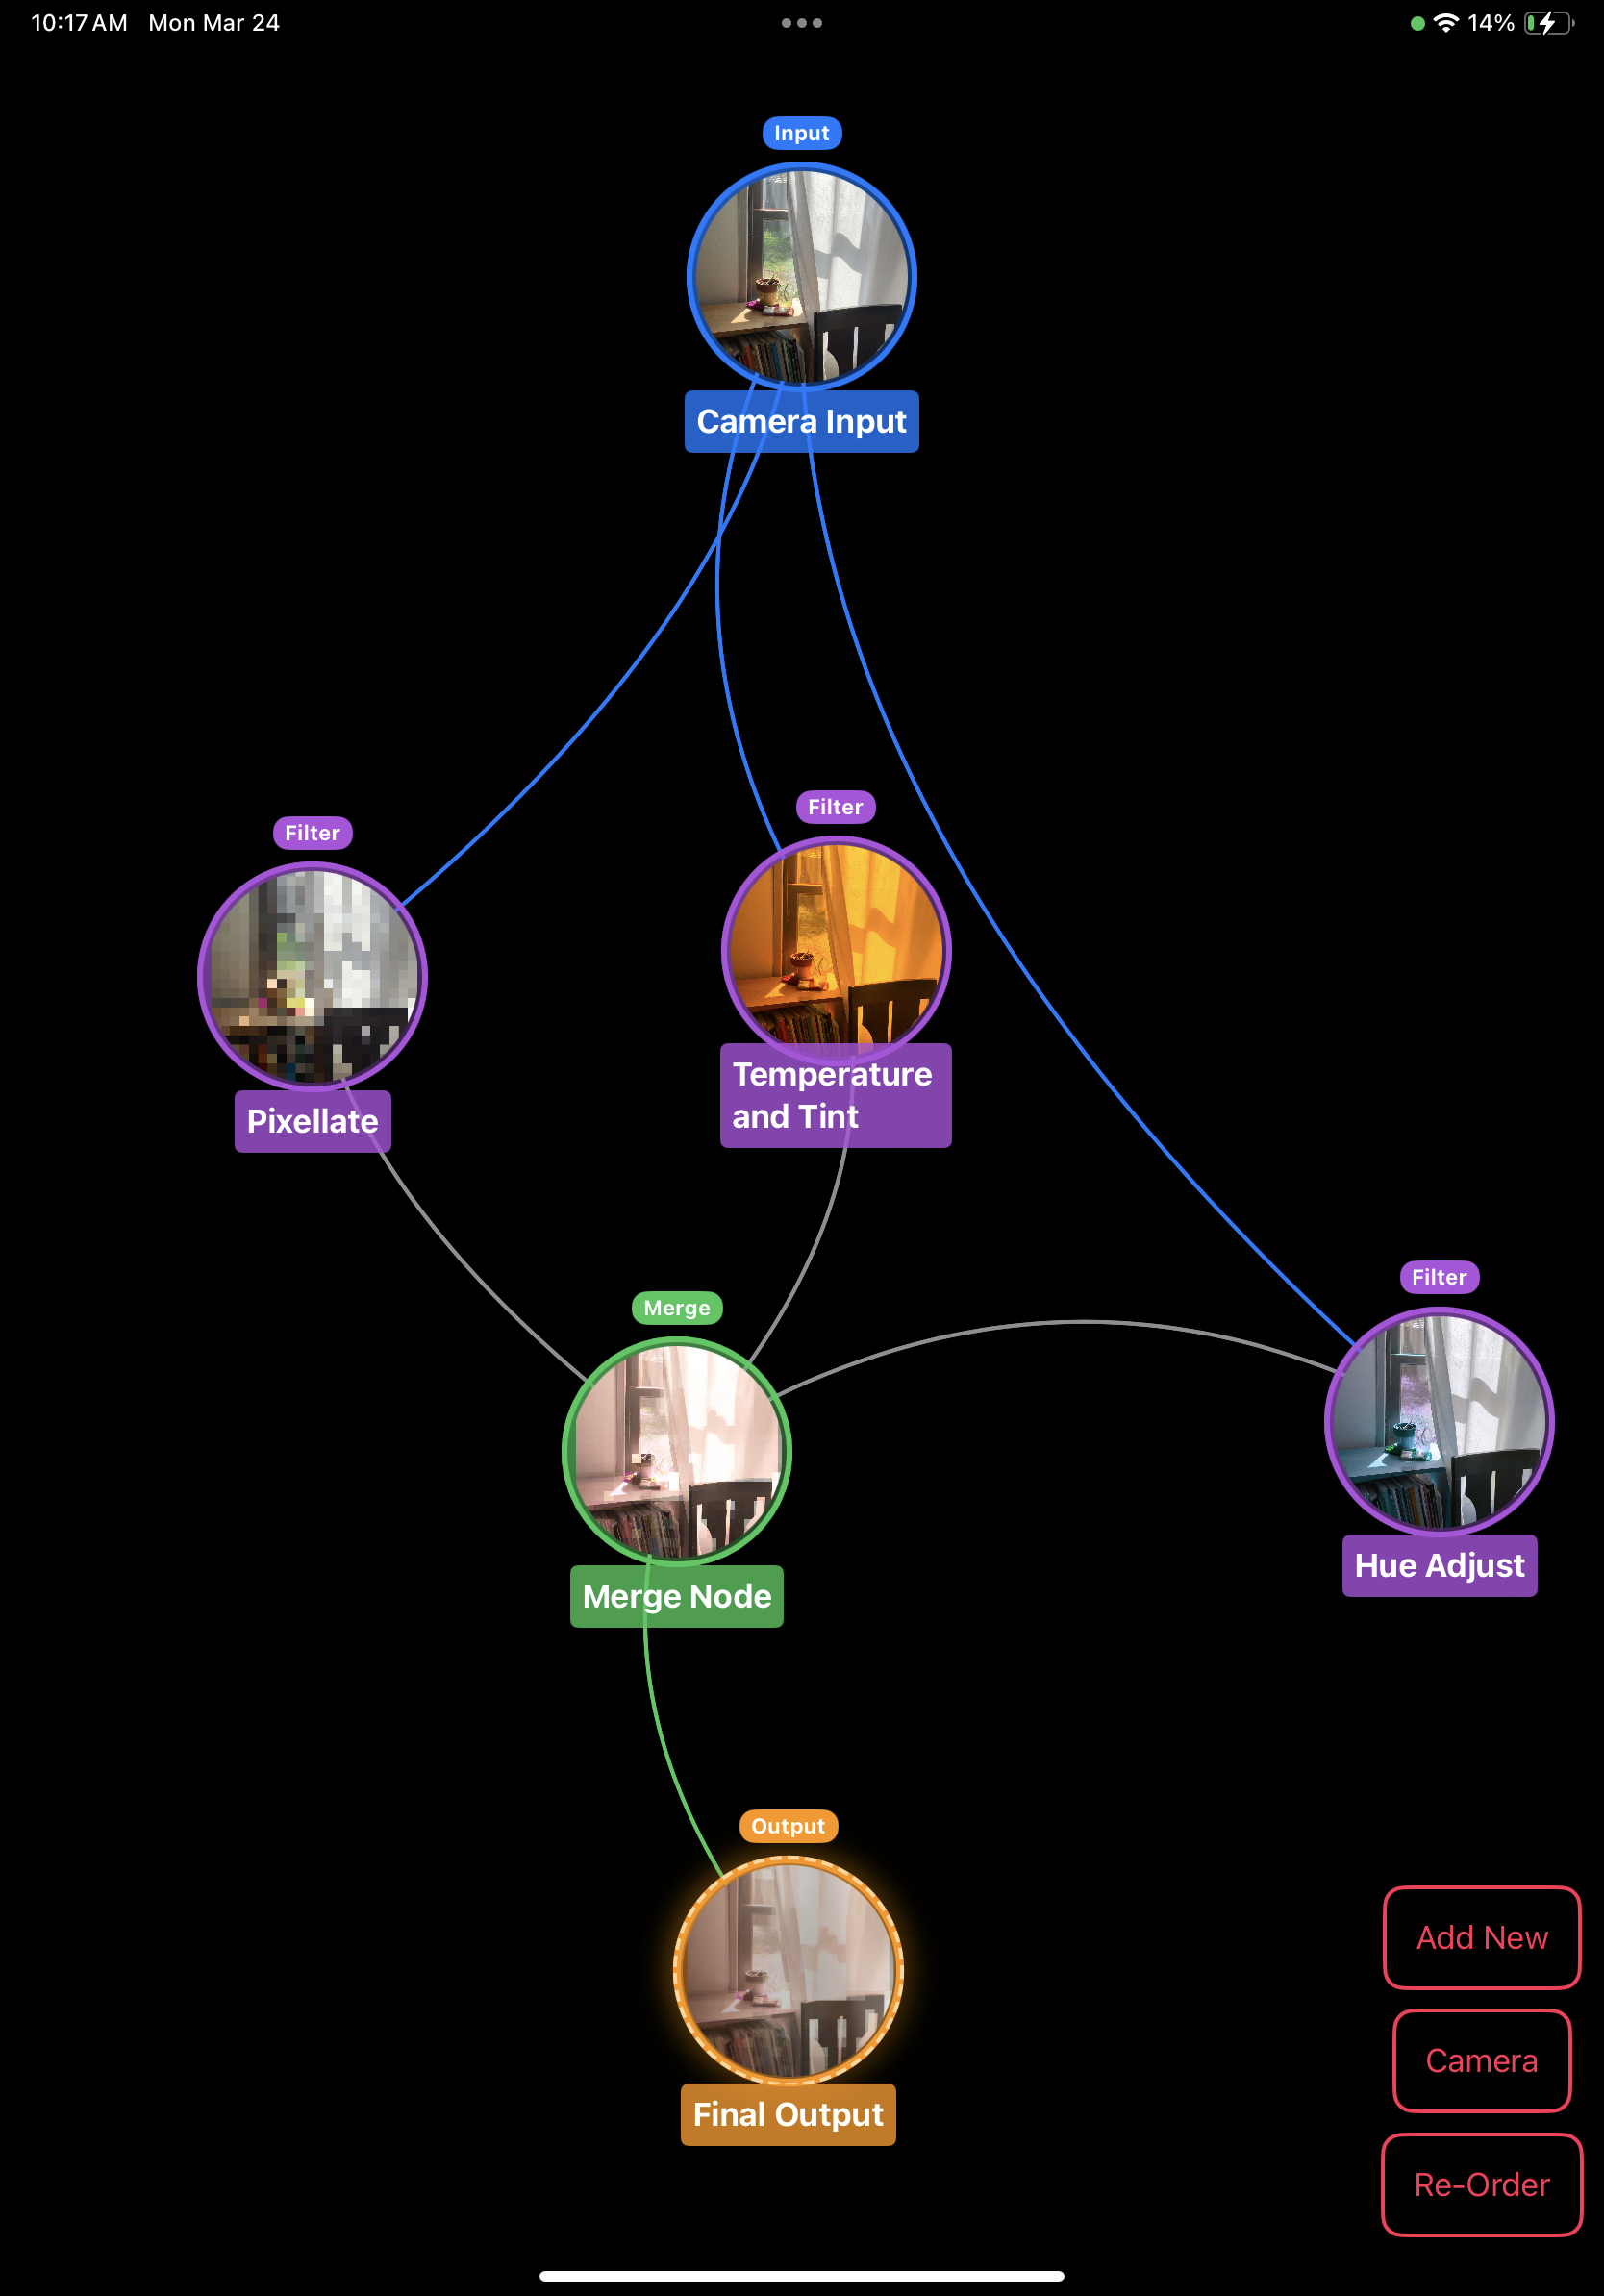
The image data flows through connected nodes from top to bottom. Each node receives input from nodes above it and sends output to nodes below it.
5. Using Merge Nodes
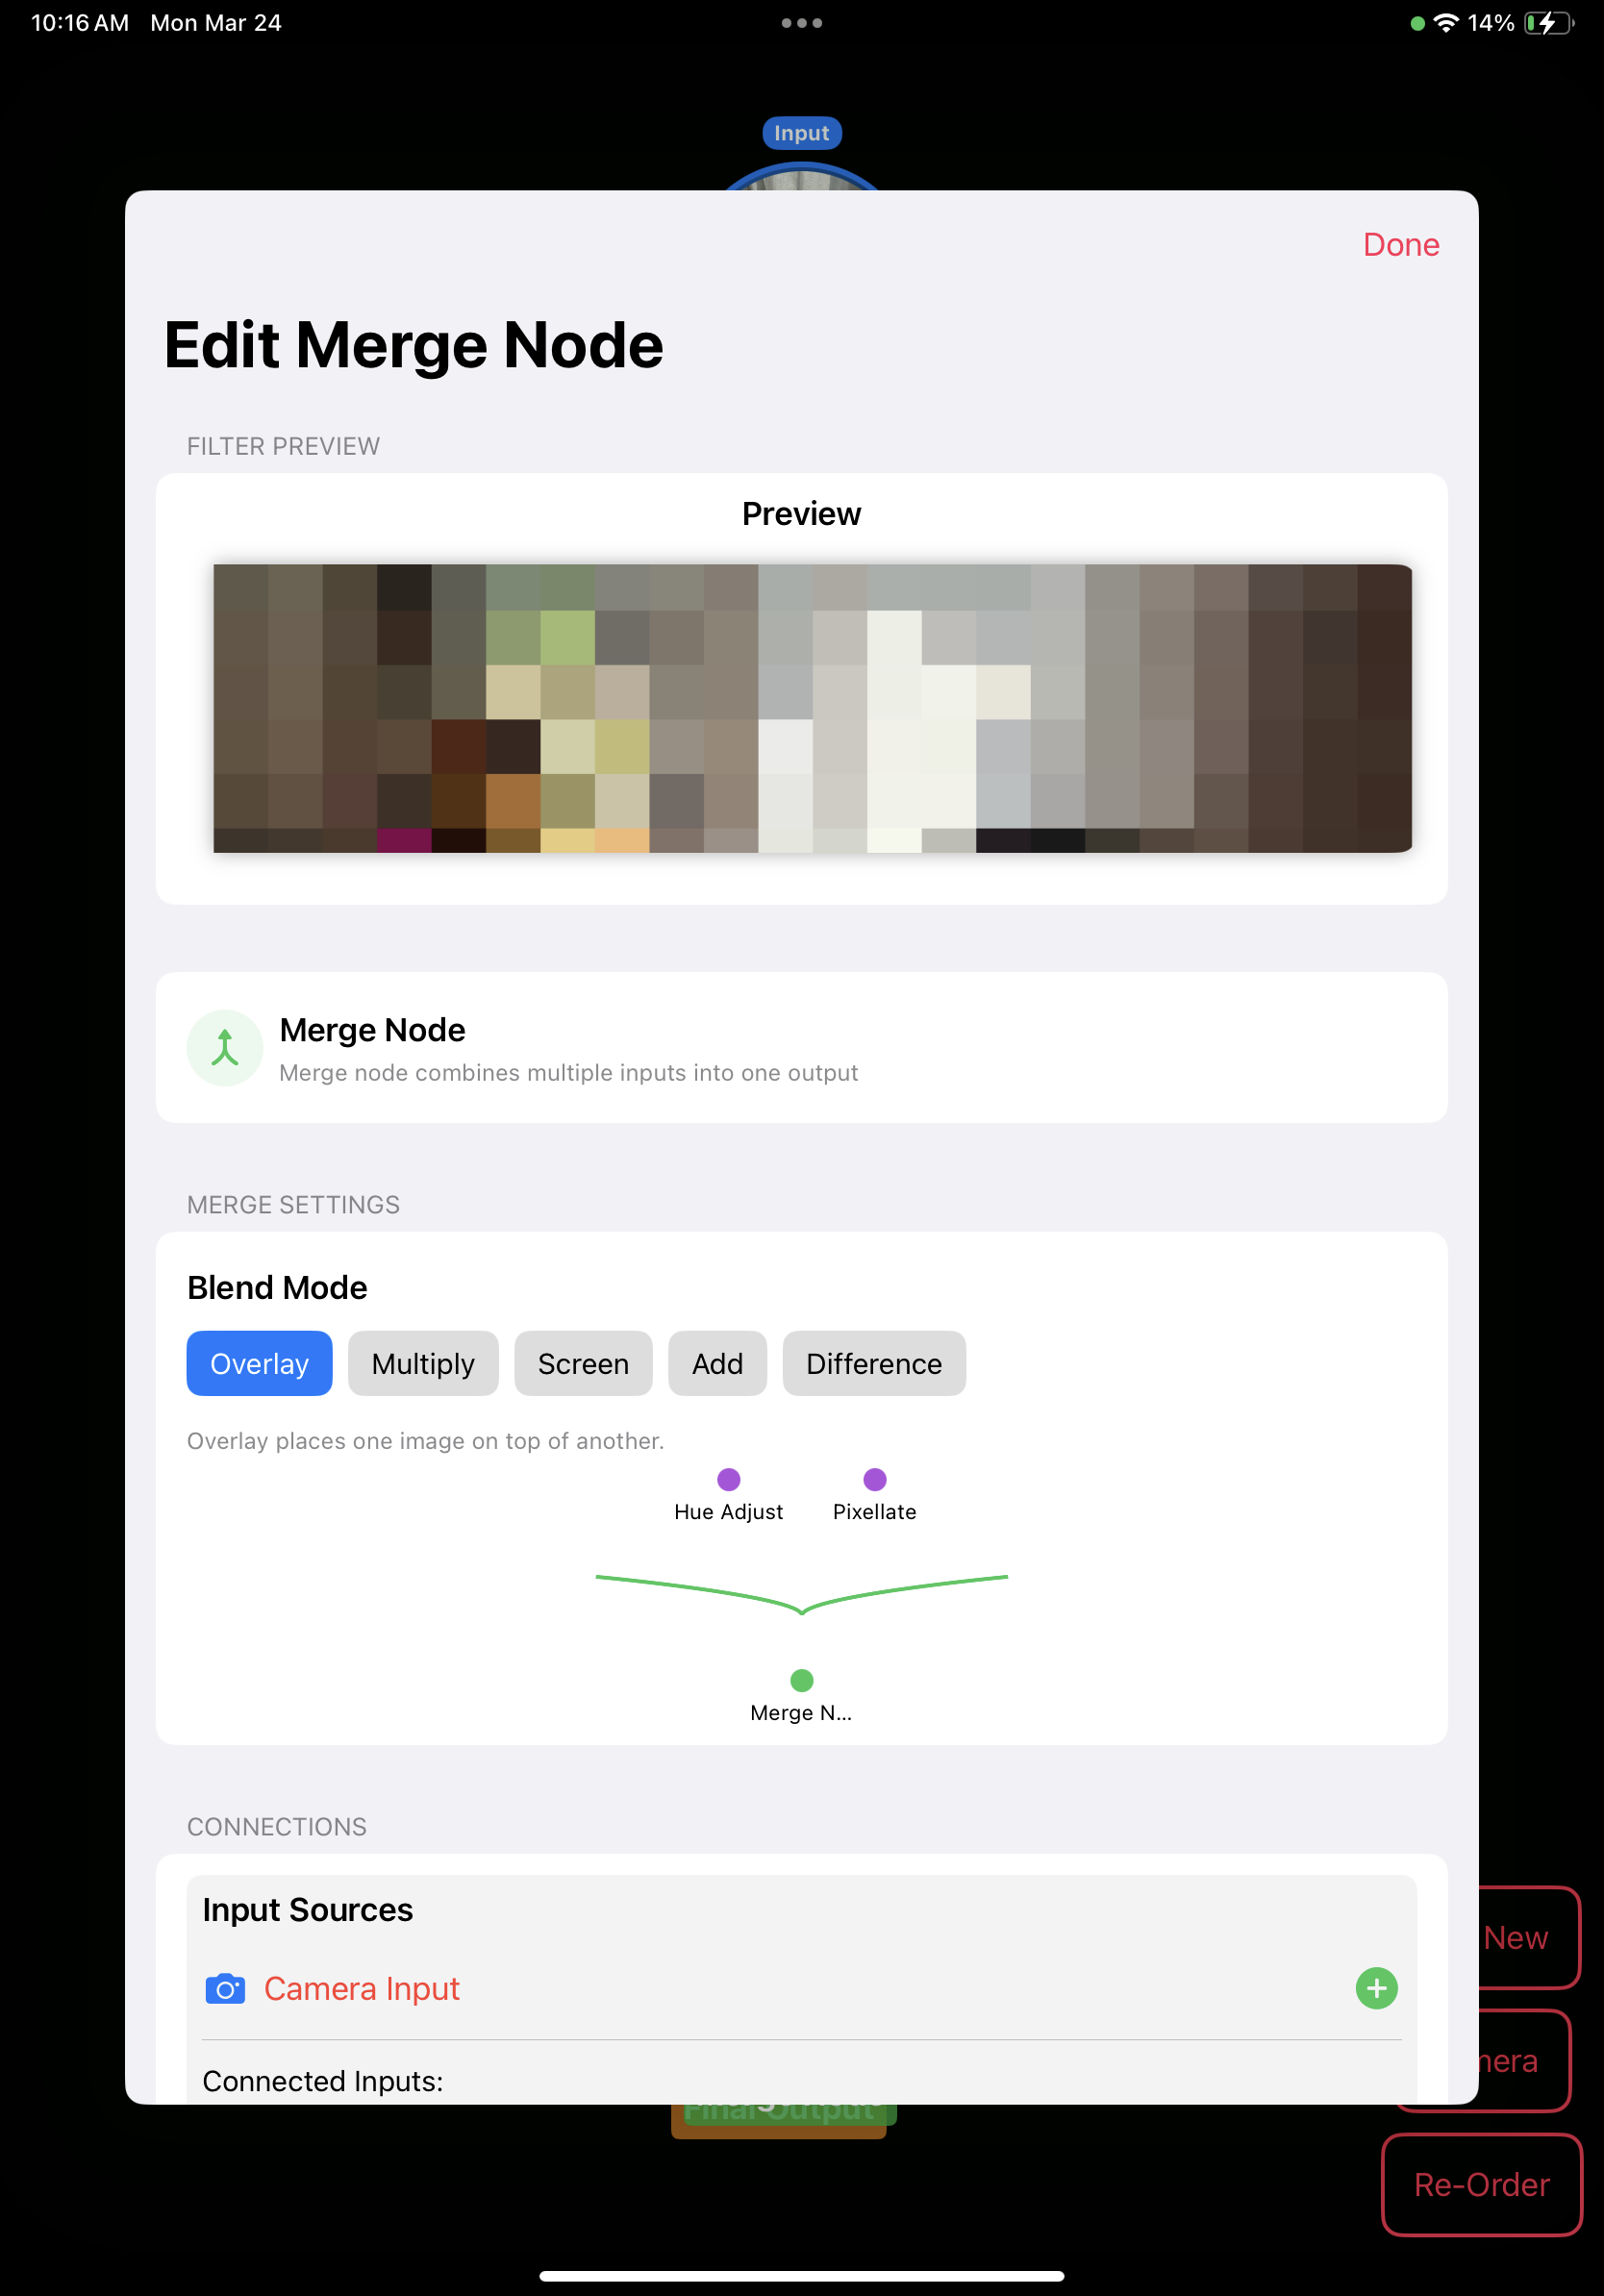
Merge nodes allow you to combine multiple filter chains:
- Add a Merge Node (green) to your graph
- Connect two or more filter chains as inputs to the merge node
- Select a blend mode (Overlay, Multiply, Screen, etc.)
- Adjust opacity settings for each input if needed
Merge nodes are powerful for creating complex effects that would be impossible with a single filter chain. Try different blend modes to see how they combine your filters.
6. Previewing and Recording
When you're ready to see your creation in action:
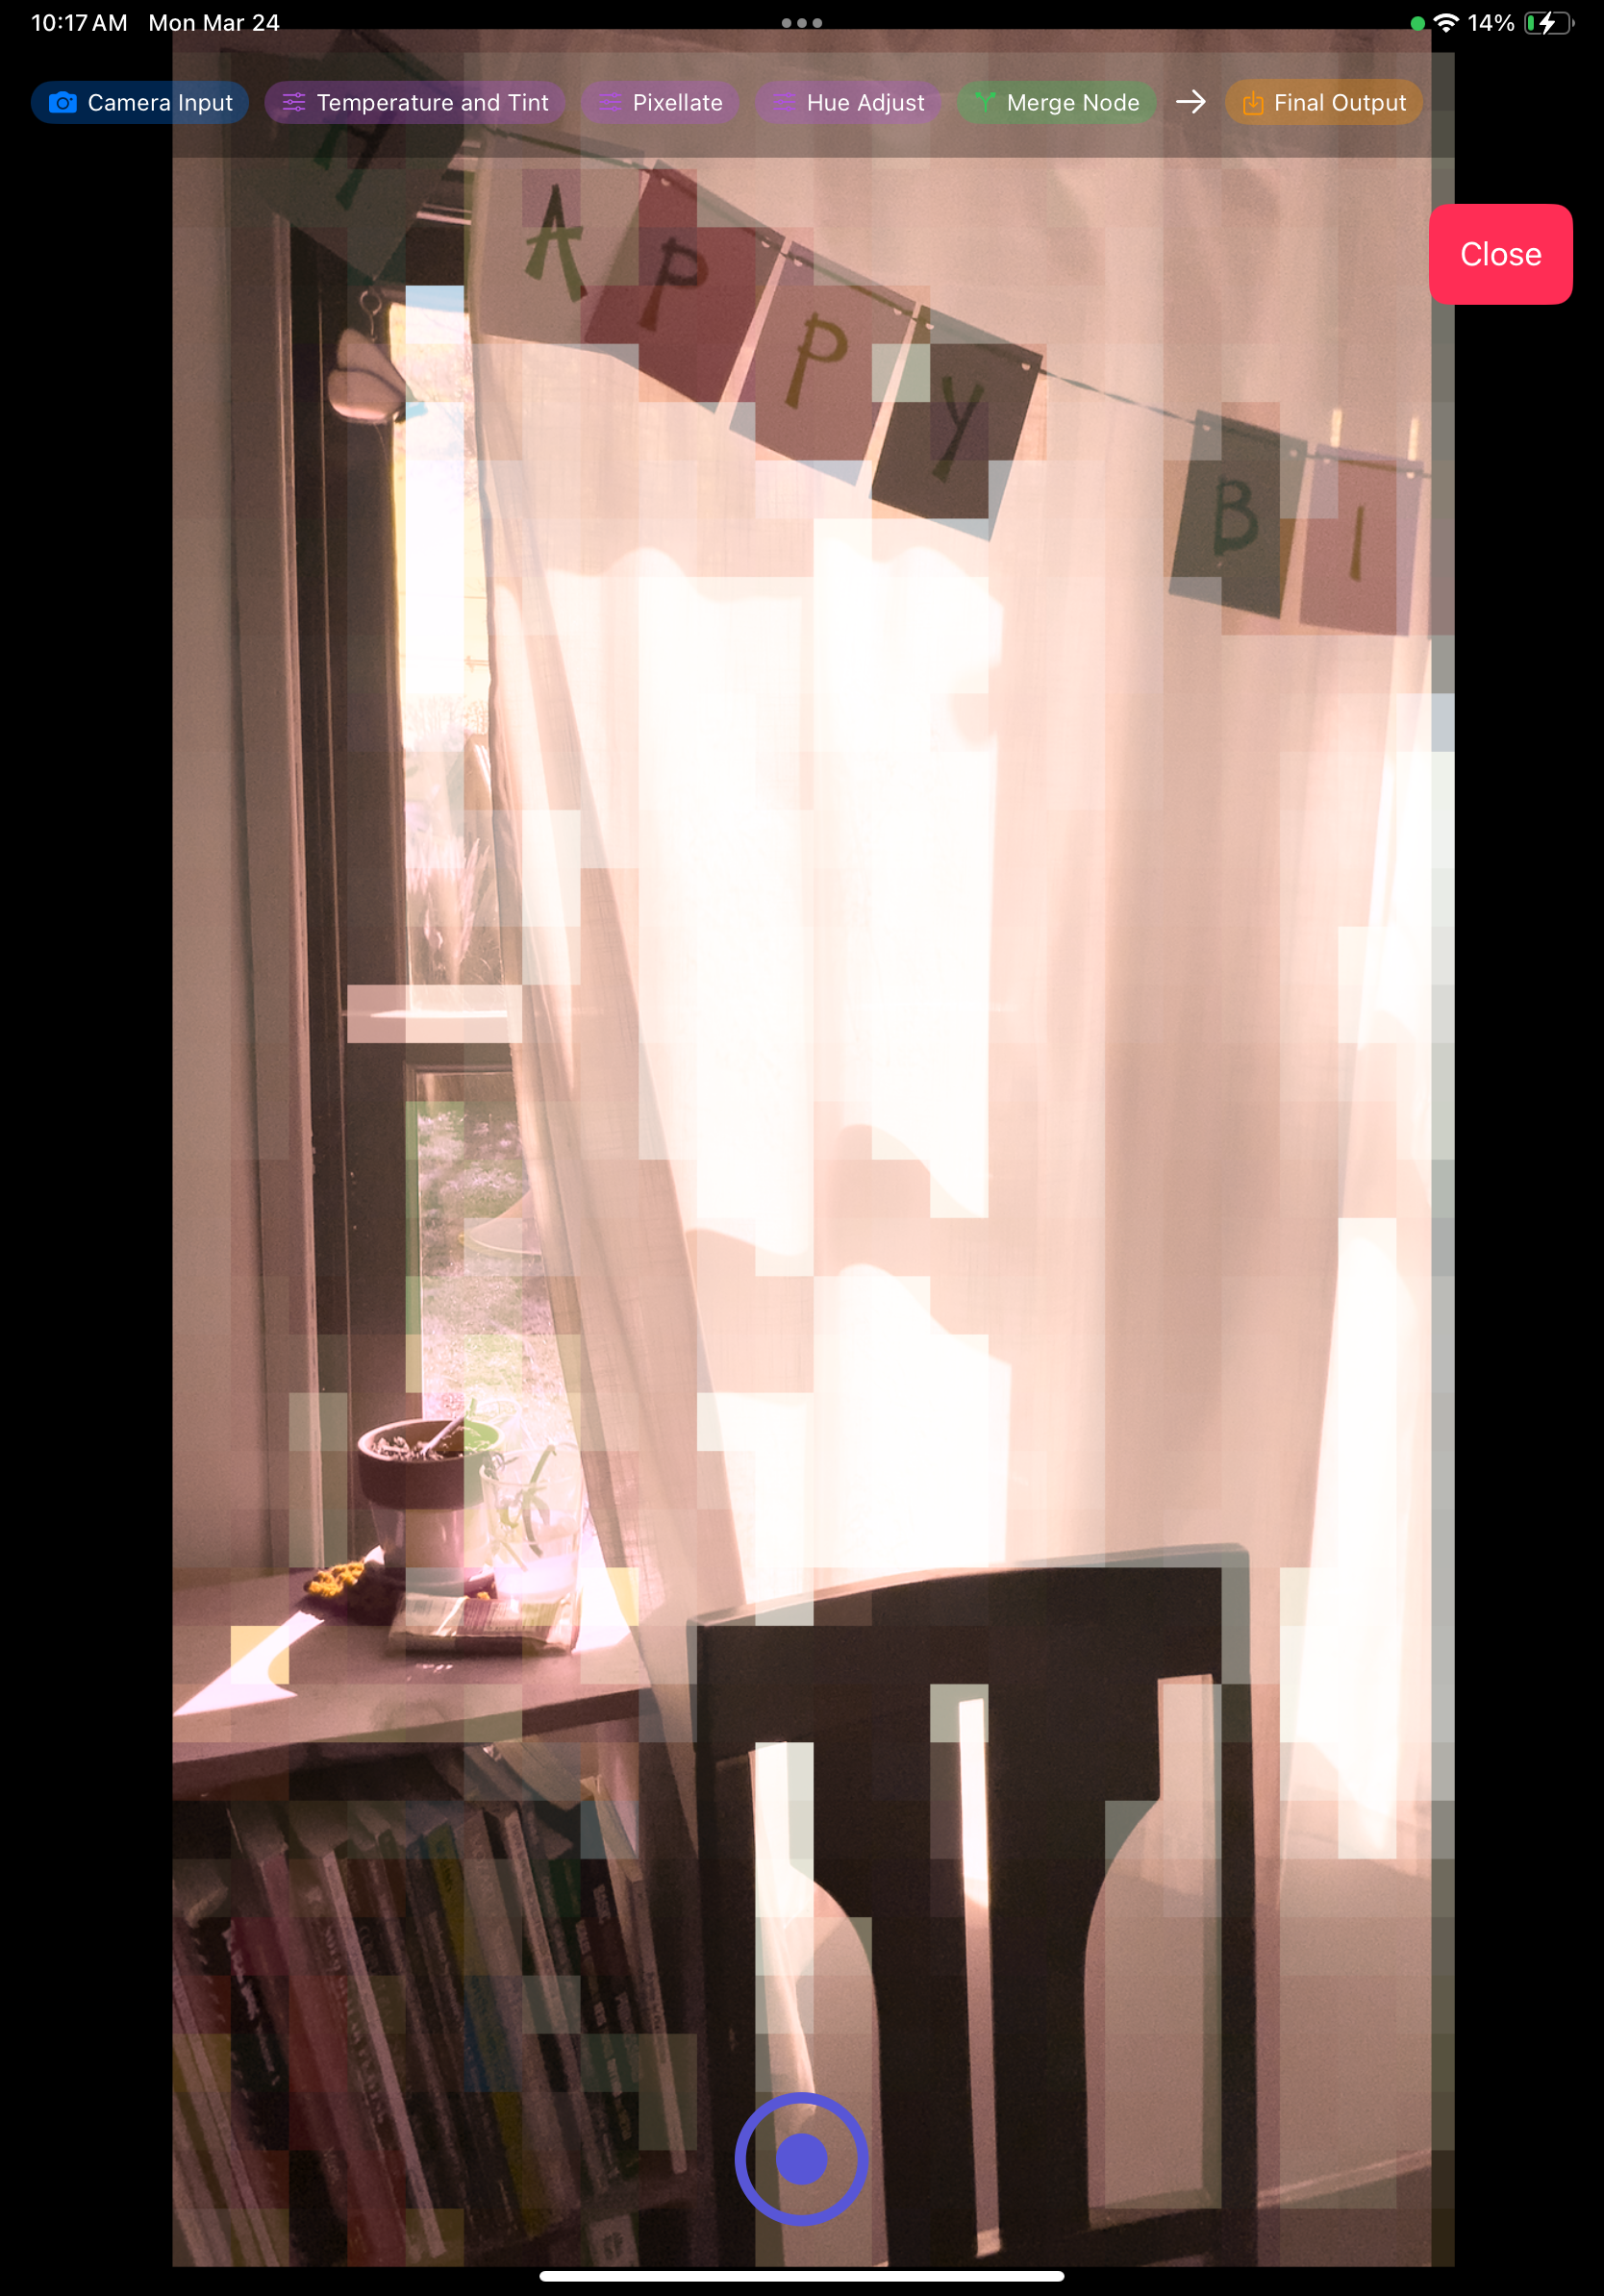
- Tap the Camera button in the bottom-right corner
- See your filter chain in real-time with the camera preview
- Note that your node graph is displayed at the top of the screen
- Tap the record button to start capturing video with your filters applied
- Tap again to stop recording
After recording, you can save the video to your camera roll or share it directly with friends.
Examples & Inspiration
Sample Effects
Here's an example of what you can create with Filter Flow:
This example uses a Temperature and Tint filter combined with a Pixelate effect, merged through an Overlay blend mode.
- Create a "cyberpunk" look with Edge Detection + Color Overlays
- Make a dreamy aesthetic with Blur + Bloom filters
- Design a vintage look with Sepia + Vignette + Grain
- Experiment with Comic Effect + Color Adjustments for unique styles
Tips & Tricks
- Start Simple: Begin with just 2-3 nodes before building more complex chains
- Delete Nodes: Tap a node, then choose "Delete Node" from its settings
- Performance: Very complex graphs may slow down preview performance
- Save Favorites: Filter Flow automatically saves your node graphs
- Connection Rules: Input nodes can't have inputs, Output nodes can't have outputs
- Experiment: Try unexpected combinations for surprising results!
Need Help?
Questions? Support? Contact us at hello@principal.la
Download Filter Flow
Ready to transform your photos and videos with Filter Flow? Download now and start creating!